Use existing bitHuman agents in real-time applications with our cloud-hosted LiveKit plugin. The avatar runs on bitHuman’s servers — no model files, no GPU needed on your side.Documentation Index
Fetch the complete documentation index at: https://docs.bithuman.ai/llms.txt
Use this file to discover all available pages before exploring further.
New here? Read How It Works first to understand rooms, sessions, and avatars.
Quick Start
Install the plugin
bithuman, livekit-agents, etc.).Get your API Secret
Go to Developer → API Keys and copy your API Secret.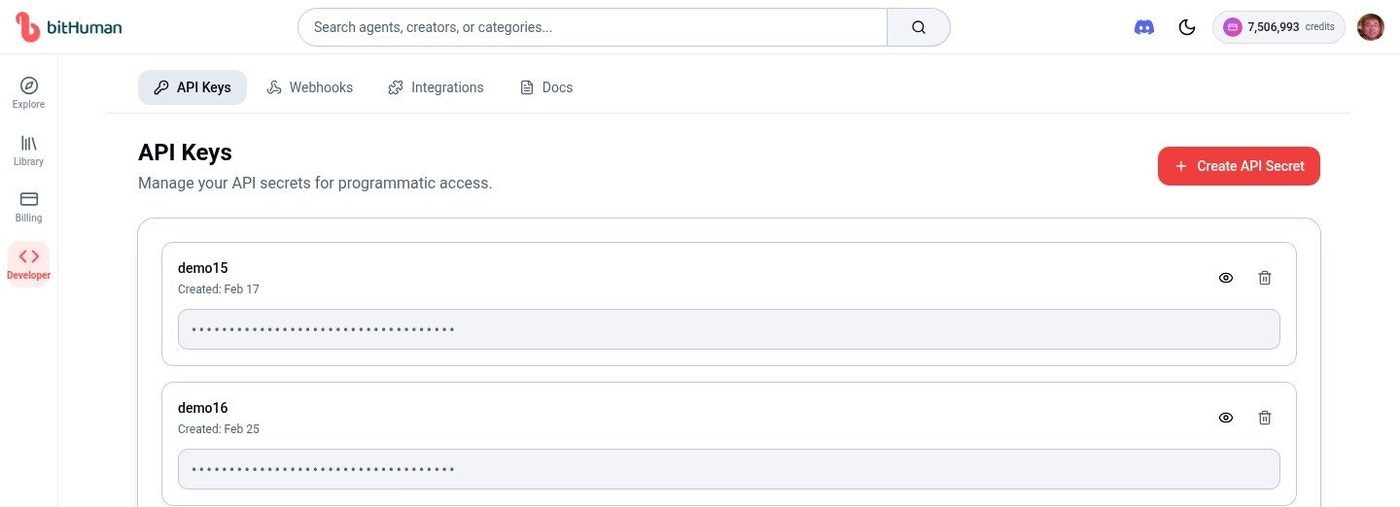
Find your Agent ID
Go to your Library and click any agent. The side panel shows your Agent ID (e.g., 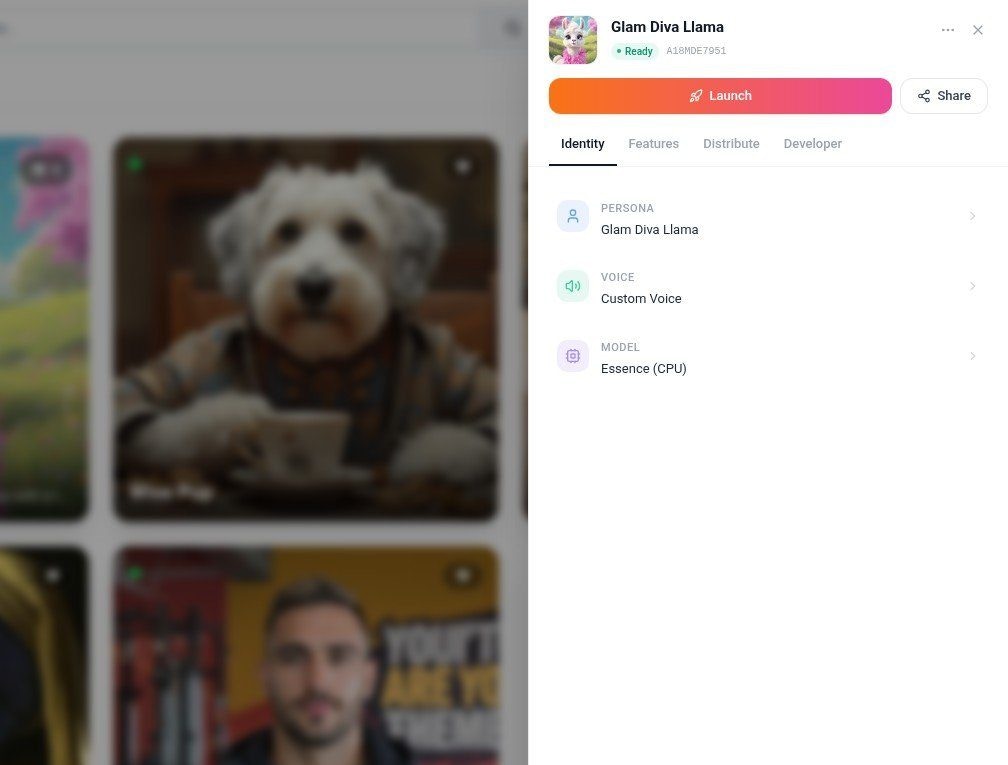
A18MDE7951).Complete Working Example
Here’s a full agent that uses a cloud-hosted avatar:What Happens When You Run This
- Your agent connects to a LiveKit room and waits for a user
- When a user joins,
AvatarSessionsends a request to bitHuman’s cloud - A cloud avatar worker downloads the model (cached after first time) and joins the room
- The user speaks → STT transcribes → LLM responds → TTS generates audio → Avatar animates
- The avatar publishes video to the room — the user sees a talking face
Avatar Modes
Essence Model (CPU) — Default
Pre-built avatars with full body support, animal mode, and fast response times.Expression Model — Agent ID
Higher-fidelity face animation for platform-created agents.Expression Model — Custom Image
Create an avatar from any face image on-the-fly.Model Comparison
| Feature | Essence (CPU) | Expression |
|---|---|---|
| Personalities | Pre-trained | Dynamic |
| Response time | Faster (~2s) | Standard (~4s) |
| Body support | Full body + animal mode | Face and shoulders |
| Animal mode | Yes | No |
| Custom images | No | Yes |
Adding Gestures (Dynamics)
Make the avatar wave, nod, or laugh in response to conversation keywords. Gestures are supported for Essence avatars only.Dynamics API Reference
Complete guide to generating, listing, and triggering gesture animations
Configuration
| Parameter | Type | Required | Description |
|---|---|---|---|
avatar_id | string | Yes* | Agent ID from your Library |
avatar_image | PIL.Image | Yes* | Face image for on-the-fly avatar (Expression only) |
api_secret | string | Yes | Your API secret |
model | string | No | "essence" (default) or "expression" |
avatar_id or avatar_image is required.
Cloud Advantages
- No Local Storage — No large model files to download or manage
- Auto-Updates — Always uses the latest model versions
- Scalability — Handles multiple concurrent sessions automatically
- Cross-Platform — Works on any device with internet
Pricing
Visit Billing or click the credit balance in the top navigation for current pricing.| Plan | Price | Concurrent Sessions | Generations/Day |
|---|---|---|---|
| Free | Free | 2 | 5 |
| Creator | $20/mo | 5 | 20 |
| Pro | $99/mo | 10 | 50 |
| Enterprise | Custom | Custom | Custom |
Troubleshooting
| Problem | Solution |
|---|---|
| Authentication errors | Verify API secret at Developer → API Keys |
| Avatar doesn’t appear | Check agent_id exists in your Library |
| Network timeouts | Ensure stable internet; the plugin retries automatically |
| Plugin installation fails | Run pip install livekit-plugins-bithuman --upgrade |
| No lip movement | Ensure avatar.start(session, room=ctx.room) is called before session.start() |
Next Steps
Avatar Sessions Guide
All avatar modes explained with complete examples
Self-Hosted Plugin
Run on your own infrastructure
Dynamics API
Configure gestures and animations